Stairs – Part 2

With the slop and mess of the foam insulation and plaster behind us and the mechanics and wiring in place, it was time to get into the details. The Cornerstone team spent the better part of two days setting the Newel Posts and getting the permanent treads and risers installed. Stairs are complicated. Our stairs are turning out beautiful. They will be the welcoming feature in our foyer.

20140511 Newell Posts-0011

Fluted box Newel Post to coordinate the details in the Livingroom mantel.

The Newel Posts were notched and installed adn look as if they have always been there. Matt and I really appreciate the beauty of these posts. Even though they were pricey, they were worth every penny.

20140511 Newell Posts-0035

The upper floor Newel Posts without the fluting to help ease the transition into a more casual space.

20140511 Newel Posts-0023

The way they turned the corner and ended the base to the wall with a wedge is quality. Most will just straight cut the base to the wall. This nice detail shows Cornerstone’s commitment to quality work.


20140511 Newell Posts-0046


20140511 Newell Posts-0120

Chopsaw


Plaster

The biggest change to the space came in a whirlwind of activity over the course of the next 3 days. First the plaster board hangers showed up. They were efficient, quick and noisy. Matt reported a lot of banging but the best part is that they were finished in one day. Here the long runs proved to speed up the process. The long runs also accentuate any misalignment and crooks in the lines/corners. We expect to see some jigs and jogs in the corners since we are using the old rafters for supports.

20140429 Plaster board-2

Plaster Board and Plaster delivered.

20140429 Plaster board-2-3

Board hung

20140429 Plaster board-2-4

Dormer Alcove

20140429 Plaster board-2-5

The view from Matt’s office end of the Attic.

On the second day the plasterers descended.  This so far has been the most rowdy group of sub contractors. At one point we think that there were about 8 men working in the attic. They came with their stilts and trowels and showed us why the floor had been lined with black paper. When they were done it looked like a tornado of plaster had rolled through the attic space and placed plaster everywhere including the floor. But with the previous Tron themed black paper, the clean up was made easier.

20140511 Plaster board-2-3

Rich in texture

We chose a simple pattern with a knocked down texture. It helps to hid imperfections. These guys were like artists and really put down a beautiful job. The way it all came together was exciting to see. They were able to patch the few areas downstairs that had been damaged and blend them into the old. Once we scuff the new patches a bit and give it several coats of primer then paint there is a chance that it may blend.

The smell is an oddly organic one. For several days the plaster drys out. It slowly migrates from a dark greenish taupe to white. It is pretty interesting to see the light pick up the different patterns and have the space start coming to life.

20140511 Plaster board-2

Zoe now loves the stairs and understands Upstairs and Downstairs.

20140511 Plaster board-2-5

Matt and Zoe both in the doghouse storage.

20140511 Plaster board-2-2
20140511 Plaster board-2-4

Mechanicals

Now that the attic has been foamed the HVAC crew came back for their installation. They ran duct work and placed the equipment. The original plan was to connect radiators as the attic was already plumbed for them. Also, to install AC for the attic and have vents cut to the first floor.

We really had a hard time letting go of the radiators in the space. We absolutely love the way they heat the house in the winter. We were not immediately convinced that replacing those with a heat pump would be a good idea. So our compromise is this, we had the plumbers cut back the stub ups for the radiator lines to just below the surface of the floor and cap them. This way if we end up really hating the heat pump we can go back.  The cost of adding a heat pump onto the Air Conditioning system was minimal in the grand scheme, about $400 additional.  It help us keep our costs down. So I guess you can say our radiators were Valued Engineered out by us.  This means we also end up with a redundant heating system on the first floor.  Not a particularly bad thing.

20140427 hvac plaster prep-2-3

Duct runs and electrical lines run overhead.

Running the duct work requires threading a series of silver round flexible ducts through the openings, reaching all the rooms both upstairs and downstairs. Since we located the Mechanical closet in the middle of the space in theory the duct runs would be even in their distribution. Their was only one snag that required a last-minute bench to cover the duct to get to the downstairs bathroom.

The electric was all run before the foam took place. It really made no difference to them.  HVAC however ran their ducts after the foam insulation was complete. The foam would have contaminated the duct lines and gotten inside unless they had been completely sealed.  And even with the seals in place too many things could have happened that would have been out of their control. It was best to wait until after the foaming process was over.

Ducting to the bathroom downstairs creates the opportunity for Zoe's future bench/perch.

Ducting to the bathroom downstairs creates the opportunity for Zoe’s future bench/perch.

20140427 hvac plaster prep-2-4

Another item of note is the black paper on the floor. No we aren’t decorating with a Tron theme in mind. This was done to prepare for the plaster. The plaster board hangers come tomorrow and this is one of the last looks at the space all opened up. We know that after tomorrow it will take its final shape and really start being the space.

20140427 hvac plaster prep-2-6

20140427 hvac plaster prep-2-5 And just in case you missed the news from Zoe’s world, she has now mastered the stairs. The scary riser-less stairs with the temporary treads have been conquered. In both directions, up and down. Keeping a dog safe in a construction zone is a full-time job.  She doesn’t go up there unless we are with her and only on limited visits.

Utilizing Hidden Space

Matt wanted to reclaimed the small area over the living room that originally was lost to the structure. It was not on our original radar when we layed out the space on paper but after peering into the darkness through the rafters it makes sense.

At first we thought that we might be getting bonus space out of it. But once the knee walls when in and we could physically see what we had, we realized it was no more than a large closet. We will utilize this space for storage. It will eventually hold our extensive DVD and CD collection. On a bad day it may double as the proverbial doghouse for Matt.

20140327-0250

This wasn’t a simple process since there was structure blocking the entry. The knee wall was cut open and beams were put in place. We ended up with a low room but it works for both of us. The 6′-2″ electrician was a bit unamused.

Another great idea from the Cornerstone team was to hold the back wall off enough to get utilities behind it. That saved us from cutting more craziness in the ceilings. We barely notice the difference in lost space.

20140420-0108

Foam

One of the goals of this phase of the renovation is to tighten up the house and step towards a more energy efficient home. We chose open cell foam insulation to fill the void between the roof substrate and the interior finishes. It will fill in between the rafters and give us a well insulated cozy home. With the bulk of the framing behind us, it was time for the foamers to come invade the house. Let me preface these next statements with this one final thought. Foam insulation is great! It yields a wonderful sound and air tight space. The process to get to the finished result is not so great.  If this was being done on a vacant home then by all means proceed ahead. For one like ours that is occupied by two people, a dog and some fish it isn’t so great. Maintaining Matt’s home office environment was next to impossible. We both ended up taking days off to deal with the homelessness.

Basically, there are a couple of chemicals that combine together in midstream while being sprayed into place and initially cure in a matter of 20 seconds or so.  If you have ever used “Great Stuff” in a can to fill a void it is very similar times 5. So let me walk you through the process. First a crew of 5 of so descend upon your home. They plastic wrap and tape up everything you don’t want to have oversprayed. This stuff gets everywhere. Then they pull back any loose insulation around the exterior edges of the house that was already in place so they can get the foam down to the sill plate. The chemicals get delivered through a series of hoses and nozzles. It is a toxic, smelly and messy job.  The workers are all in protective gear with respirators. The part that we had the most difficult time with was leaving the house. We abandoned the home for a less smelly environment as we were directed. It was the most unpleasant part of the renovation to date. The crew worked diligently but was unable to finish the entire attic in one day. They finished the work early on the second day. With every window and door open for full ventilation, we were able to sleep in our home on the second night.

20140420-0140
Once the foam goes through its initial cure. Then it is shaved even with the rafters in places that will act as a support for finishes, plasterboard in our case.

20140420-0105 20140420-0168The product does its job as advertised. But homeowners must be ready to evacuate during the work and for 24 – 48 hours after the spraying stops. While the toxic part of the curing process is over relatively quick. The smell is present for up to 30 days after the job is complete. On certain days I can still catch a whiff of the foam. I would recommend taking a long vacation while this process ventilates.

20140420-0130

Framing – Raising the Ceiling and Leveling the Floor

Work to raise the collar ties went by fast. As expected, it made a huge difference in the configuration of the space. Instead of a long skinny space the proportions are closer to normal. It won’t feel so much like an attic but instead like a second floor. This was one of the benefits of having a professional in charge of the job. They could see what we hadn’t and realize the full potential of the space.

20140327-0257

String lines help to keep the collars ties level and true in their new position.

20140327-0241

Collar ties moving up.


The subfloor also went down about this time. You can still see the original slats that currently make up the attic floor. The original floor is uneven with dips and humps throughout. When the subfloor is laid down the Cornerstone team takes this opportunity to level out the floor, in some cases adding up to an inch of underlayment. Installing the subflooring was certainly not for the faint of heart. It required a good bit of brute force. It was a loud and somewhat destructive process. A couple of chunks of plaster came down on the first floor ceiling as a result. Not unexpected but still surprising. When it is complete it is solid and sturdy. Feels good to walk around up there. This will help with the noise level on the First Floor also. It was a concern as Matt’s new office space will be directly over the bedrooms.

20140327-0271

The subfloor and leveling begins at the mechanical closet.

20140406-0556

Collar Ties raised, flooring complete and framing mostly done.

20140327-0275

Zoe still not coming up those scary stairs.

Chimney Demo

Now with the stairs in an operable state the work in the attic begins. The chimney came down, first the outside and then continued to the floor level.  We will remove the rest of the chimney to the basement during the kitchen renovation.  By removing that unused chimney we now have more floor space to give to the HVAC. Not my first choice for locating the mechanical closet but a good location since that will make the mechanical central to the house. Well balanced is efficient design for HVAC. The original intent was to align a closet with the bump out from the bathroom space and step slightly into the space behind the knee wall. The reality is that the mechanical closet turns out much larger.  This is the same battle architects have at work with engineers.  We say here is a space for the mechanical, electric and plumbing equipment and they say “I need more”.  So when our Mechanical team said the same thing on our house, I wasn’t very sympathetic. At one point they wanted to take the entire right side of the stair opening for a closet. Yikes! that no longer is a closet in my book, that then becomes a room. So no. They did, in the end, give a little and so did we. The Mechanical closet actually bumps out past the location of the chimney, but in the end it all works out.


20140322-DCS_0136

Chimney removal continues inside the attic, brick by brick.

One of the very best recommendations that our builder saw in the space was to raise the collar ties. It never occurred to us that this could be done and how much impact that would make. In this photo the collar ties are in their original location. This would have left us with a ceiling height of 7′-4″. It would have been low but tolerable. But the builder immediately said we will come in and cut the ends of the ties and relocate them to raise the ceiling. That was brilliant! It did several things for the space.

  • It gave us a more proportional appropriate space instead of a long skinny one. The ceiling height will be 8″-6″.
  • It allowed us to have real lighting fixtures that even can hang slightly.
  • And triple bonus, it allowed the framing team to get a level line so our ceiling wouldn’t be crazy wavy.
20140322-DCS_0117

Chimney coming down. Collar ties in original location. Bathroom starting to take shape.

20140322-DCS_0170

View of the chimney removed. Dormers with peeling paint and rotting wood siding.

20140322-DCS_0143

The bathroom was originally plumb in the house but never realized. A few relocations and consolidations of vent stacks.


Stairs

We were so excited after the first abbreviated week’s work, little did we know it would only get better and more exciting. The stairs took shape almost instantly. I can barely remember the time when the stairs were hidden behind the closet door. Having drawn the new stair plan so many different times from the napkin sketch when the idea first crossed my thoughts to the CAD plan it appeared just as I imagined it would. In the begin of this idea I wasn’t sure if there was enough room to get the proper run to accommodate the needed rise to get to the attic.  By creating an L-shaped stair it gave us just enough room to run the treads out to a nice comfortable foyer. Seeing this idea come to life was very exciting. It has created a gracious entry and opened up the foyer.

The two closets we sacrificed will of course be missed but the funny thing about this house is that there are more hall closets than I have ever seen in any house, at least there were. Before there were 4 now only 2 remain. although temporarily we have claimed the leftover space at he bottom of the old stairs for a coat closet at least until the kitchen goes to renovation. So for the next year, most likely, we will utilize the odd but useful coat closet at the bottom of the stairs leaving us with 3 hall closets, for now.

20140319-DCS_0458

Almost instantly they appeared. The stringer for the original stairs can be seen through the back of the new stairs.

20140319-DCS_0467

First look from landing to front door.

With the temporary treads on and the ceiling opened up a bit, the attic is now open. With our late spring arrival the temperatures have dipped back into the 30’s, the attic is now open. The little things you don’t think about can make the biggest impacts. We improvised a solution. Nightly the opening got covered with a drop cloth and leftover piece of paneling. It made a world of difference in the comfort level and heating on the first floor. Correcting the lack of good insulation in the attic has been one of the goals of this phase of the renovation.

One of the other things we didn’t count on was that Zoe was terrified of this new obstacle between her and her humans. When we would go upstairs to marvel at the progress that had been done that day, she would just sit at the bottom and give us the look.

20140322-DCS_0093

All cleaned up for the weekend.

20140322-DCS_0166

Are y’all having fun up there without me?


Renovations Begin – Phase 1

100_8359

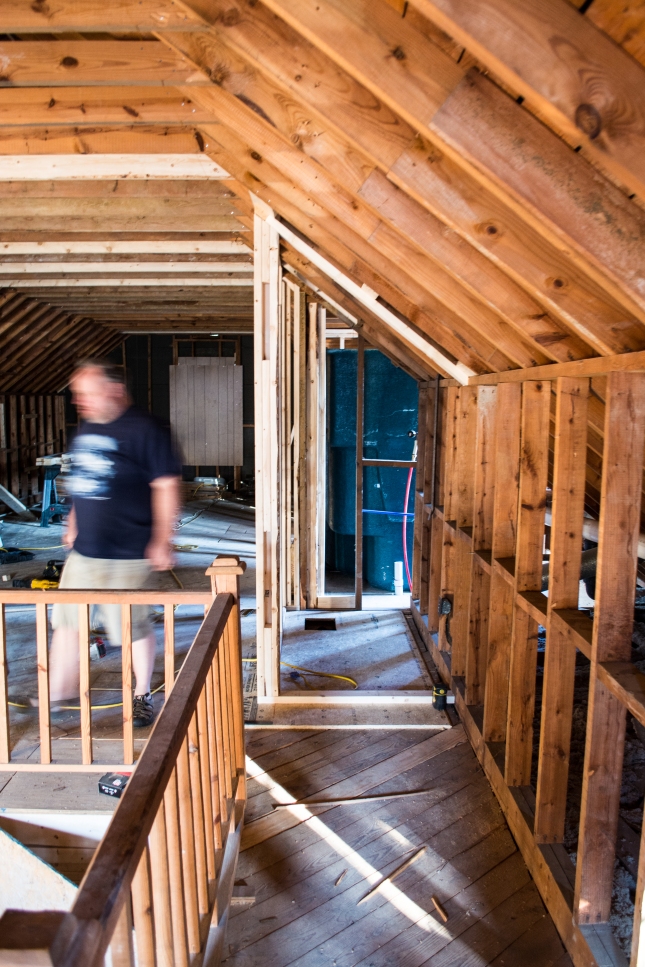
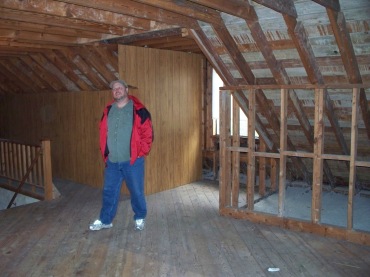
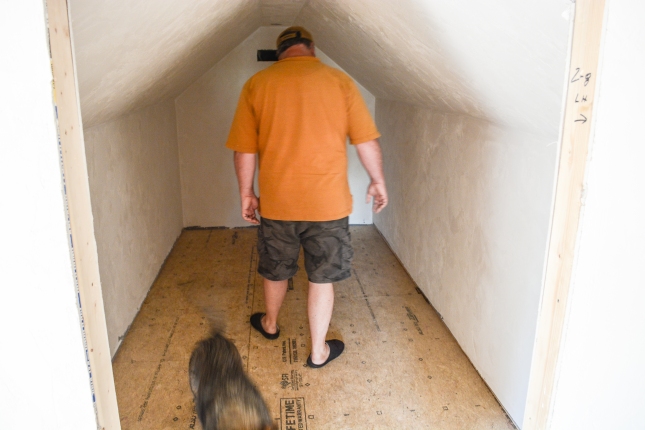
The first time Matt saw the attic space and started dreaming.

One of the things that drew Matt and I to the house was its overwhelming potential, big rooms and solid construction. That was just over 4 years ago. Since that time, we have lived in the house and let it speak to us. The design ideas are somewhat different from the first days in the house and probably somewhat different from they would be if we waited 3 more years. But here we are today and the big renovation starts now.

Up until now, we have just done things in the house that were necessary and practical. We have replaced the oil burning behemoth of furnace with a high-efficiency natural gas boiler, refinished the floors, replaced the dishwasher when it finally gave up and built the infamous fence for Zoe. Just the necessities.

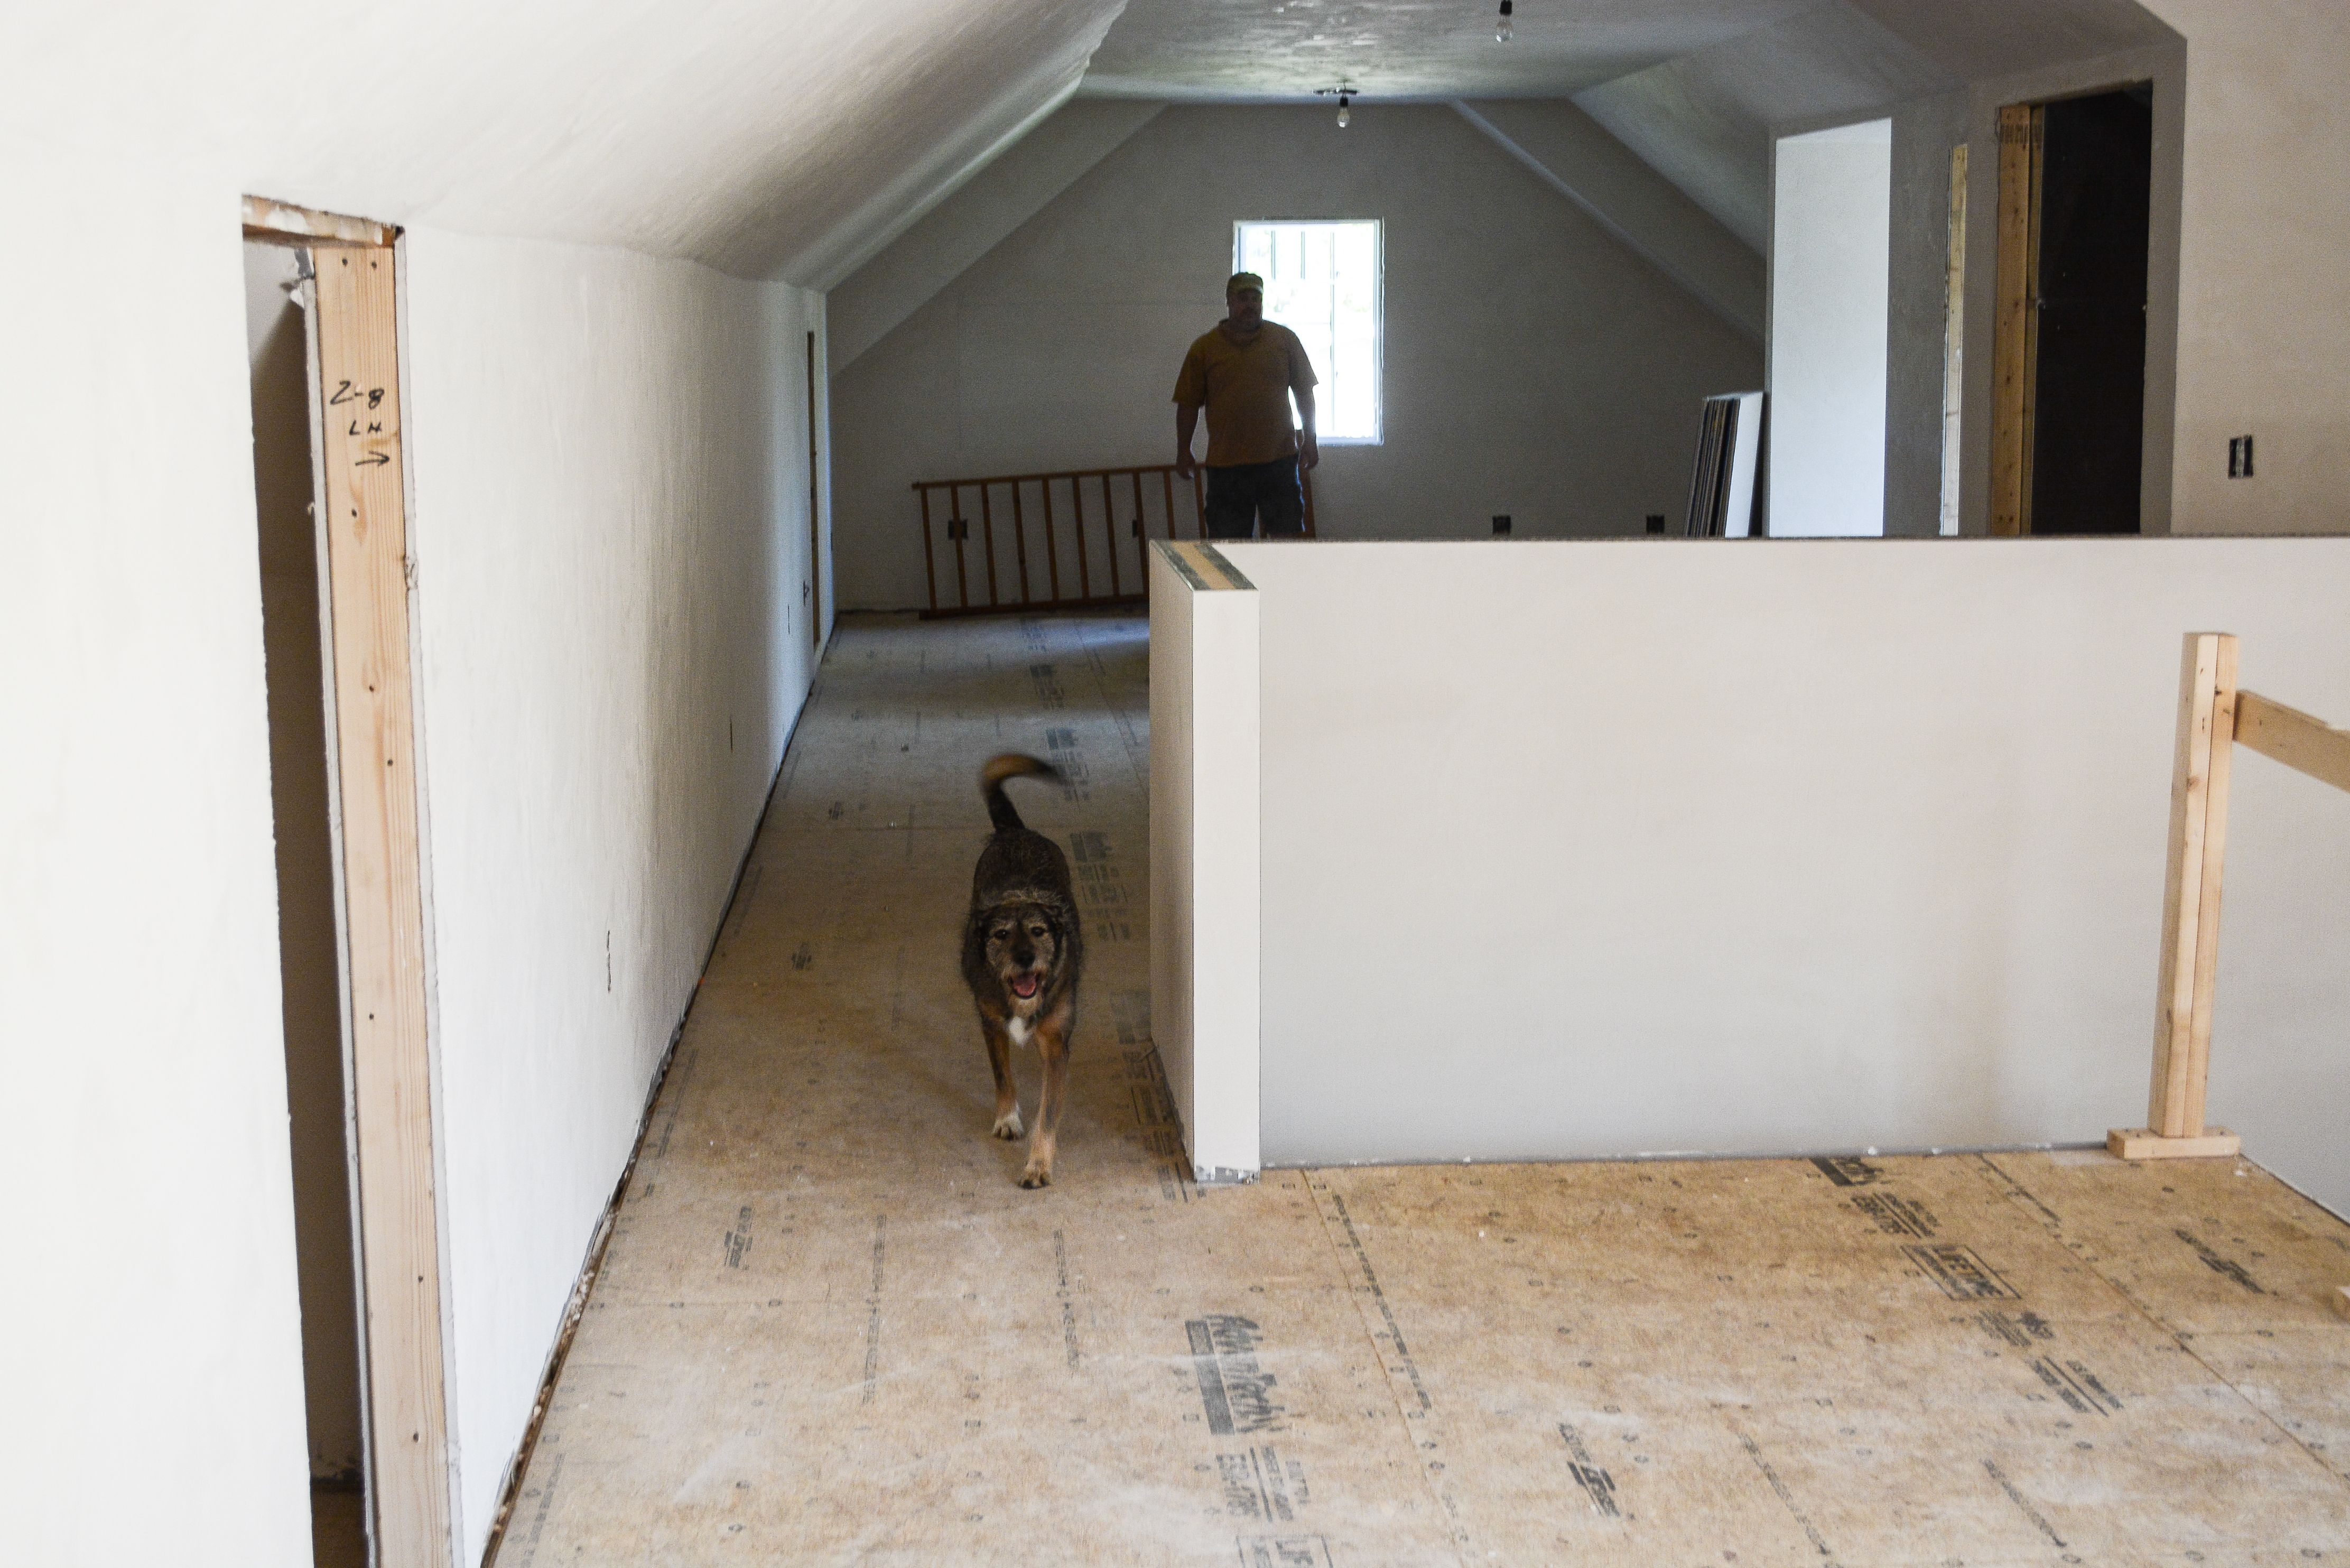
We first prioritized the renovations that we thought would be good to get done in the order with thought. Bathroom, Attic, Kitchen – that was the plan. But then priorities shifted and the seasons came and went and we you get the idea, now the list is Attic, Bathroom and Kitchen.  We know the Kitchen is the last piece of this puzzle but the importance of the attic became urgent when Matt landed a great job in the corporate world. He has quickly outgrown our shared office space and is ready for a real home office and the joys of central AC. Also by relocating the stairs, we set up the kitchen phase by getting the stairs out of the way of future renovations that will align the hallway.

But like most puzzles there are a lot of connected parts and pieces. Figuring out just what to include in this phase of the renovation was key to making it work. This is where we are so glad that we enlisted the help of a professional. Cornerstone Builders saw and shared our vision from the beginning, there really was no question of using anyone else.  The Cornerstone crew have all tirelessly answered endless questions and sometimes in tandem, as Matt and I are usually not in the same place during the days. They are patient and through with their answers.

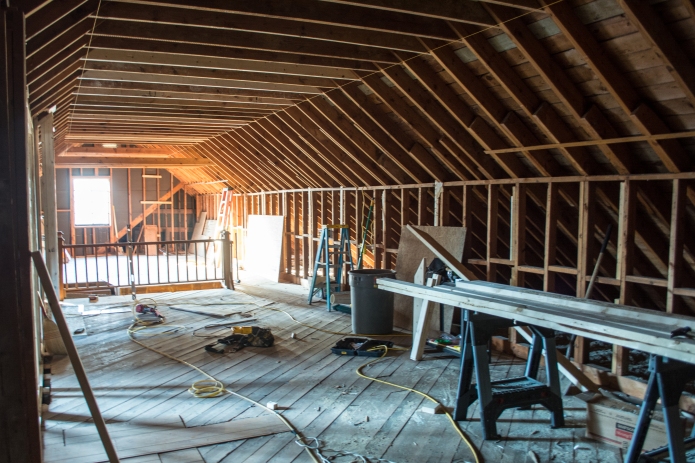
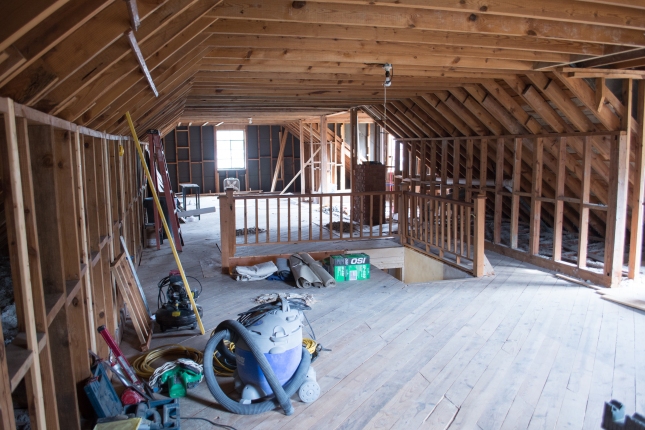
So for Phase 1 of the Renovation we are including:

  • redirecting and re-configuring the stairs to the attic
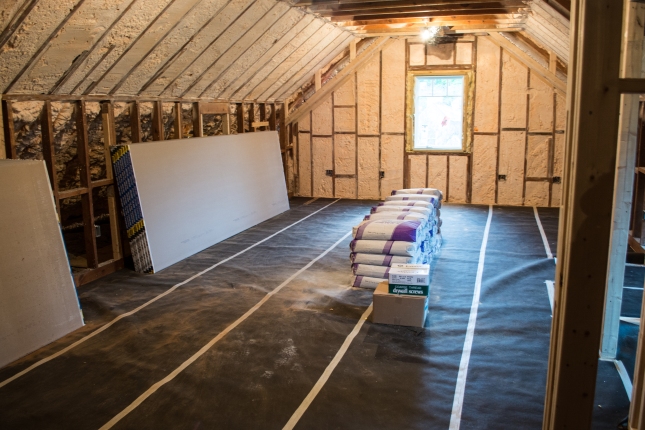
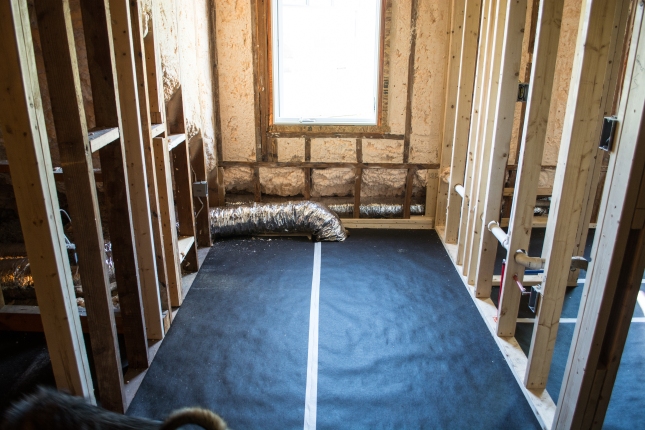
  • blowing in open cell insulation
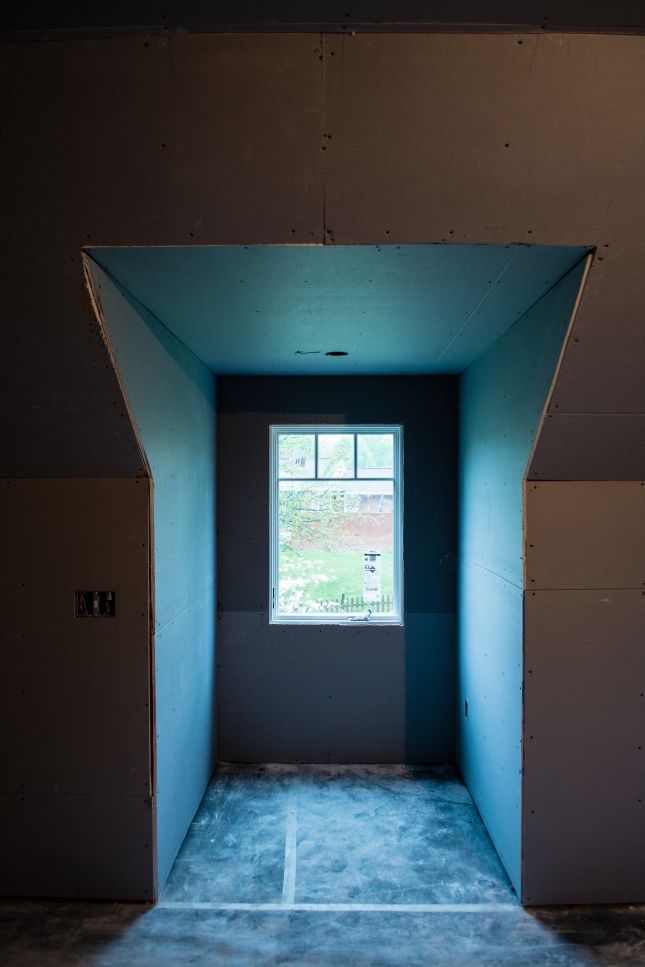
  • attic window replacement
  • removing the upper portion of a decommissioned chimney
  • replacing the deteriorated wood siding on the existing dormers
  • adding central AC to the attic with drop down vents to the 1st floor
  • adding a heat pump system to the attic

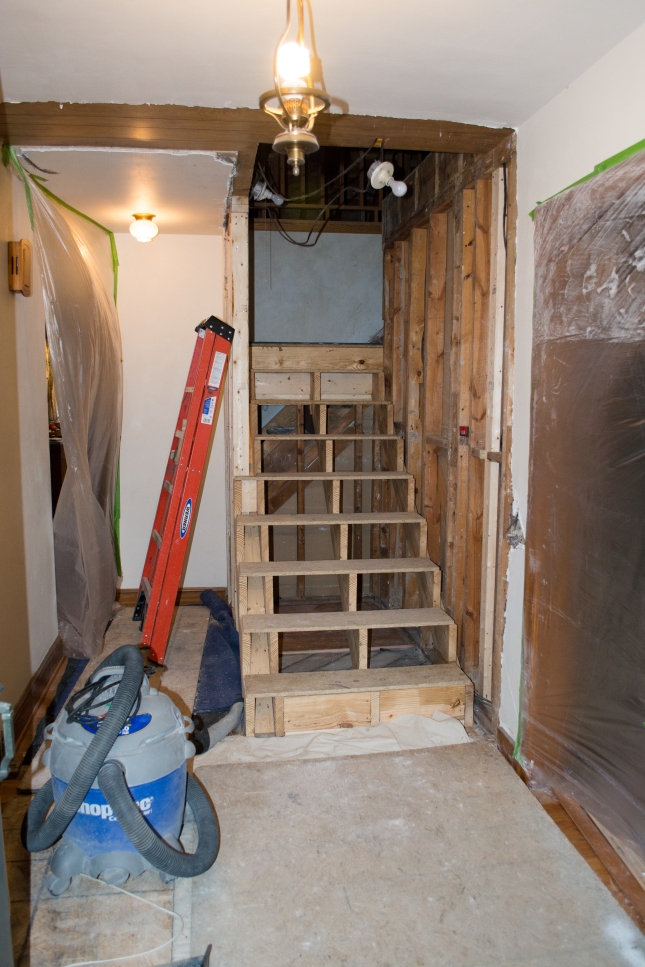
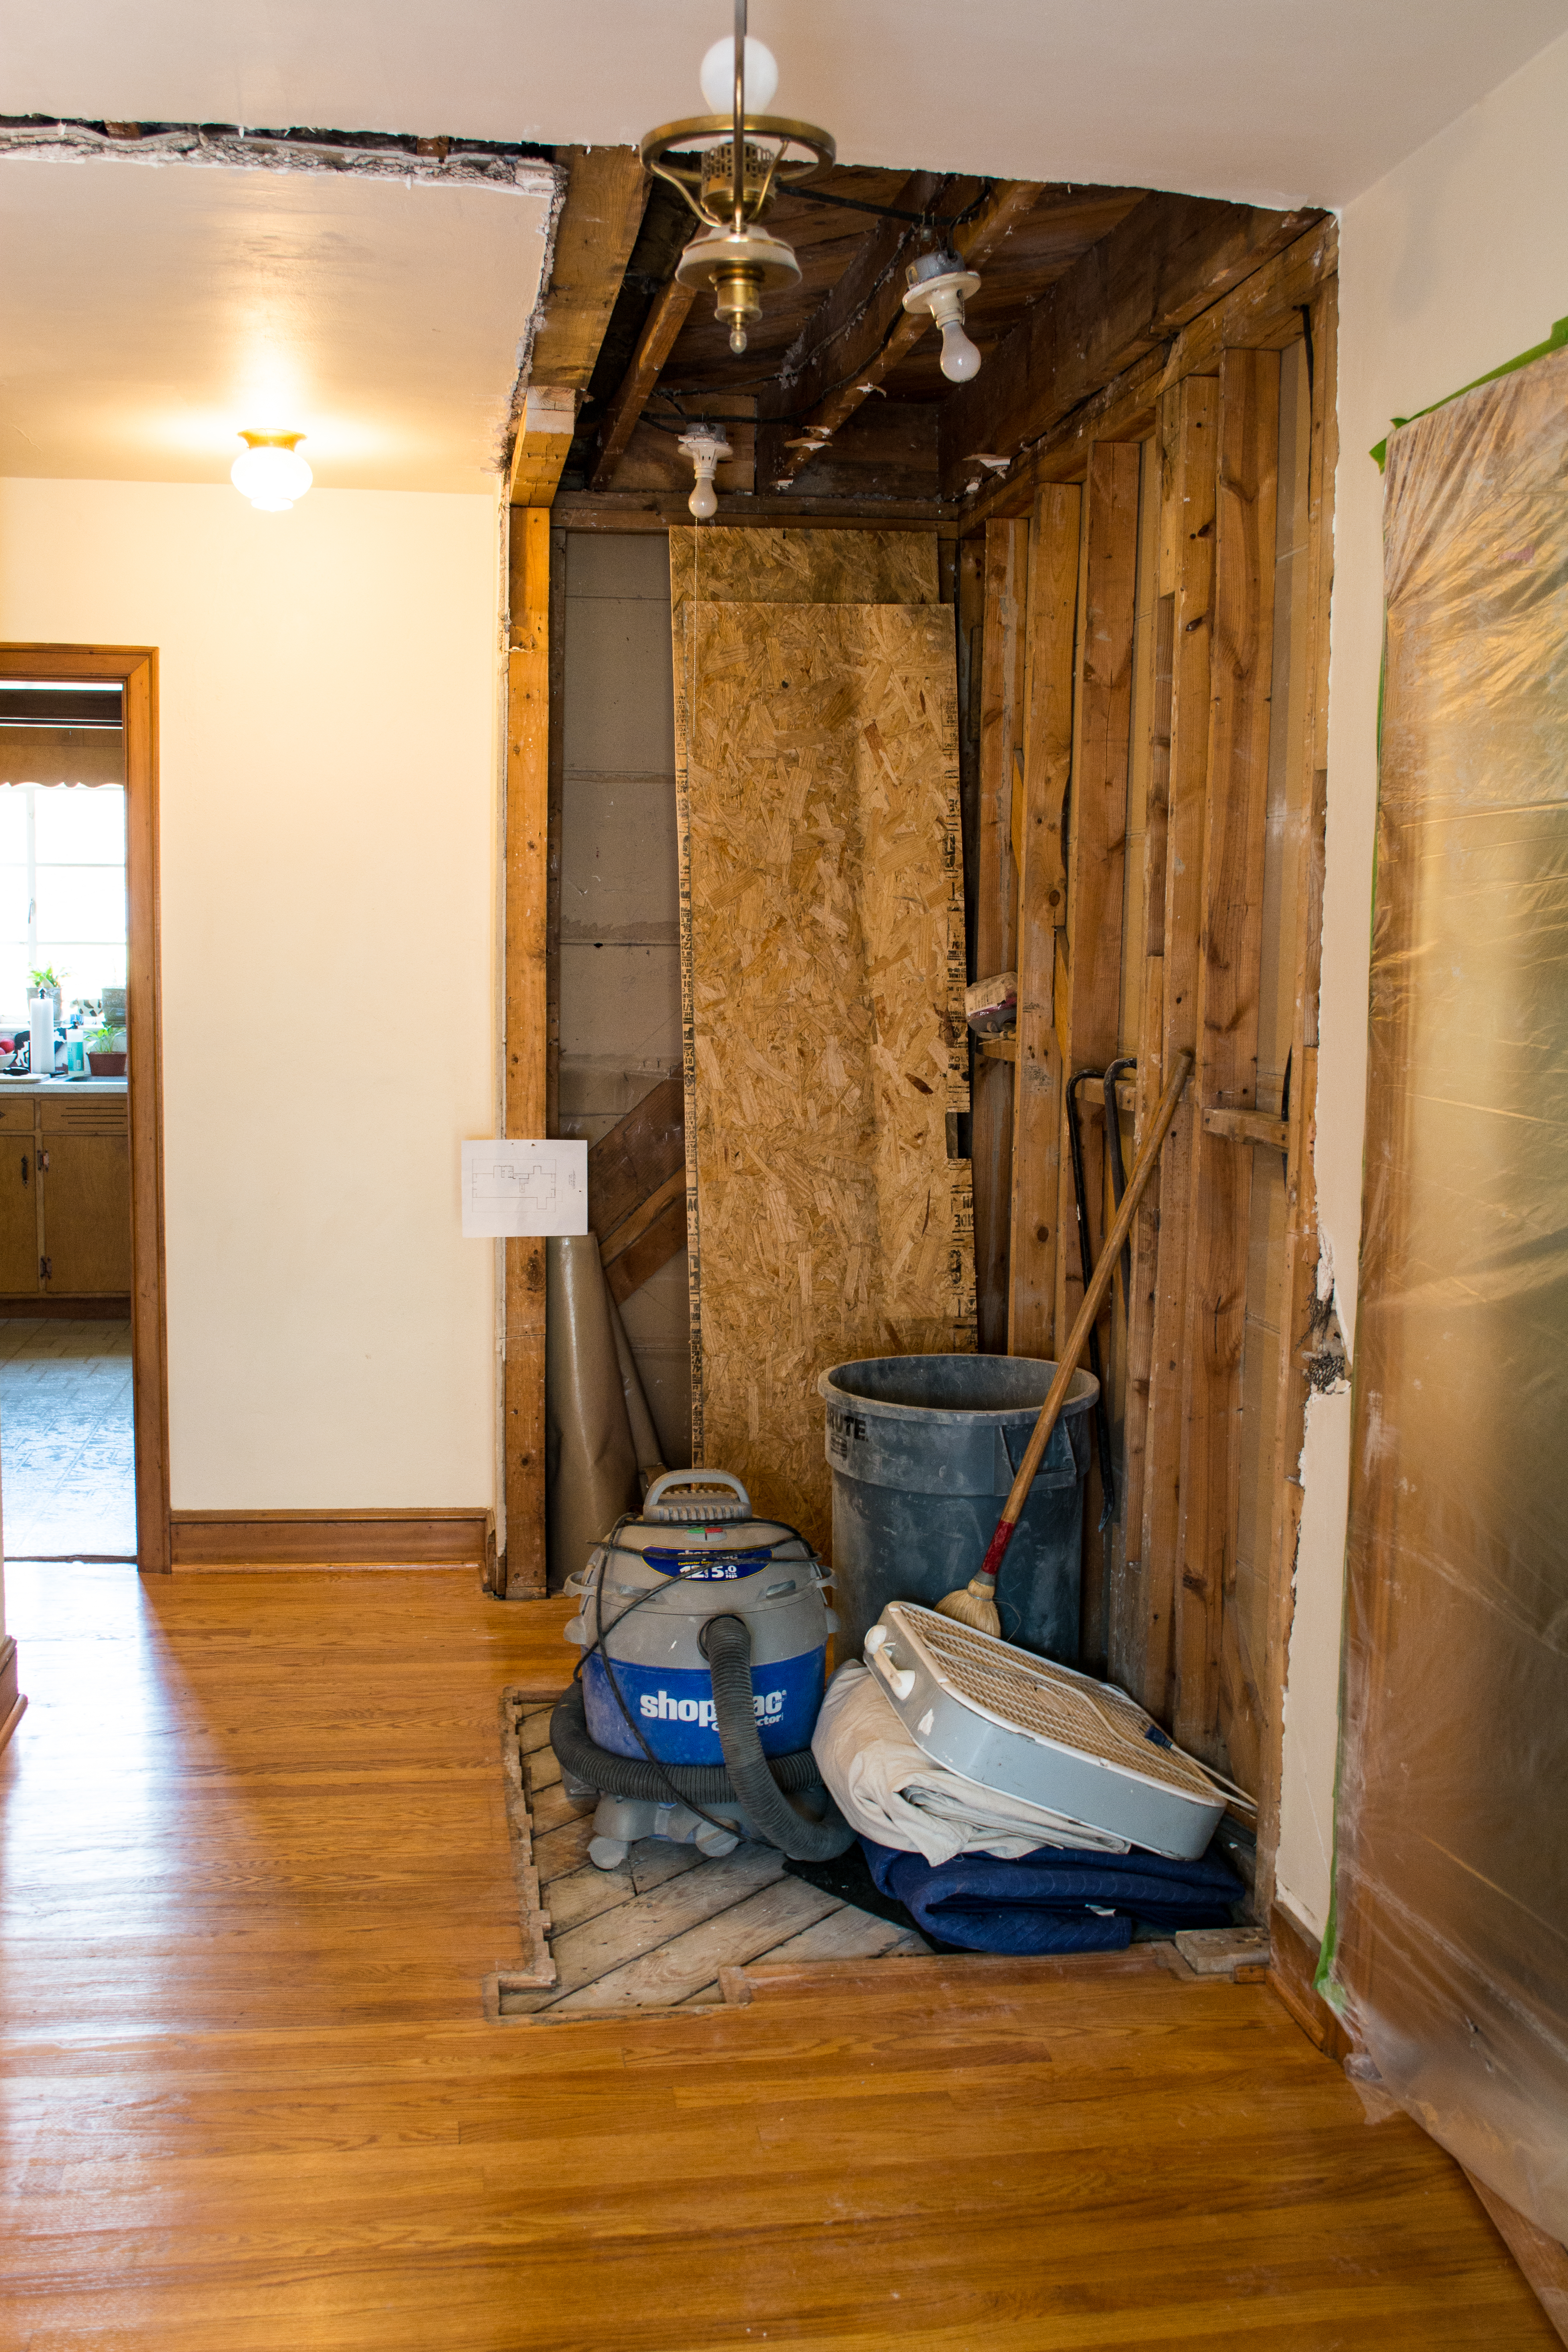
We will talk more in-depth about each one of these elements as they happen. So far the Cornerstone crew has been mobilized for two days on site and they have already made a huge impact. The two closets are gone and the foyer is ready to receive the new stairs. The builder decided to do the stairs first so the rest of the construction job would be easier to haul materials up to the upper level. We are excited to see the changes.
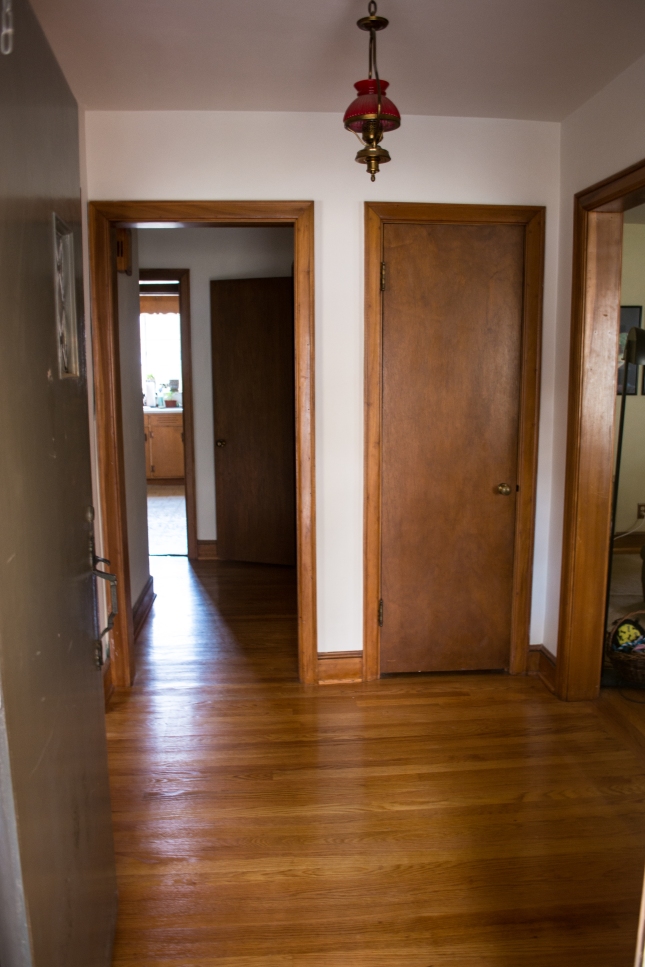
Before

Before

Closet guts gone. Protective covering on floor. Dust barriers in place.

20140315-DCS_0023

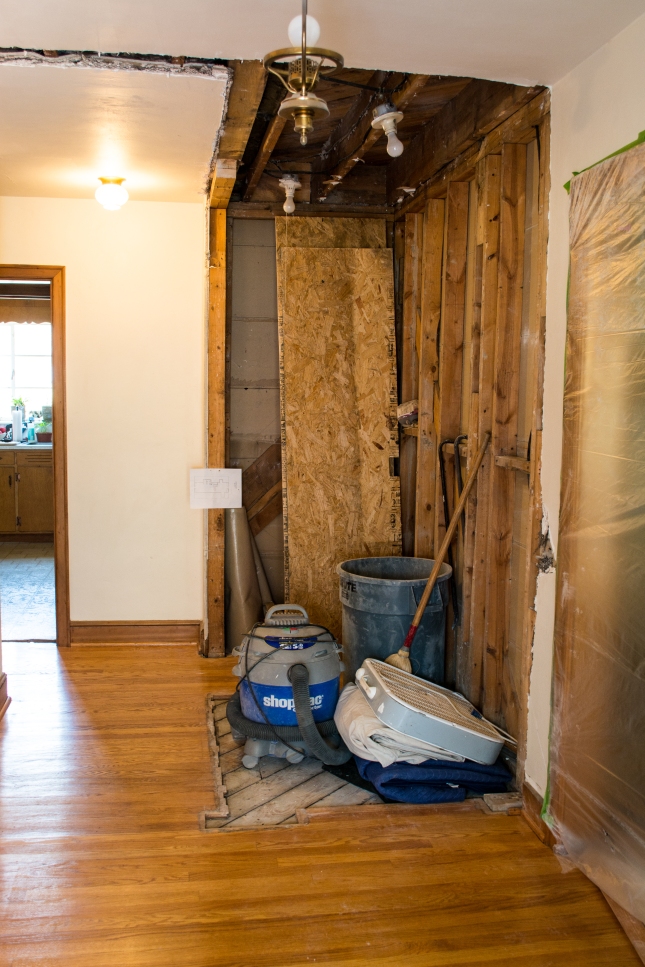
Closets gone, making way for the new stairs. Left clean for the weekend.
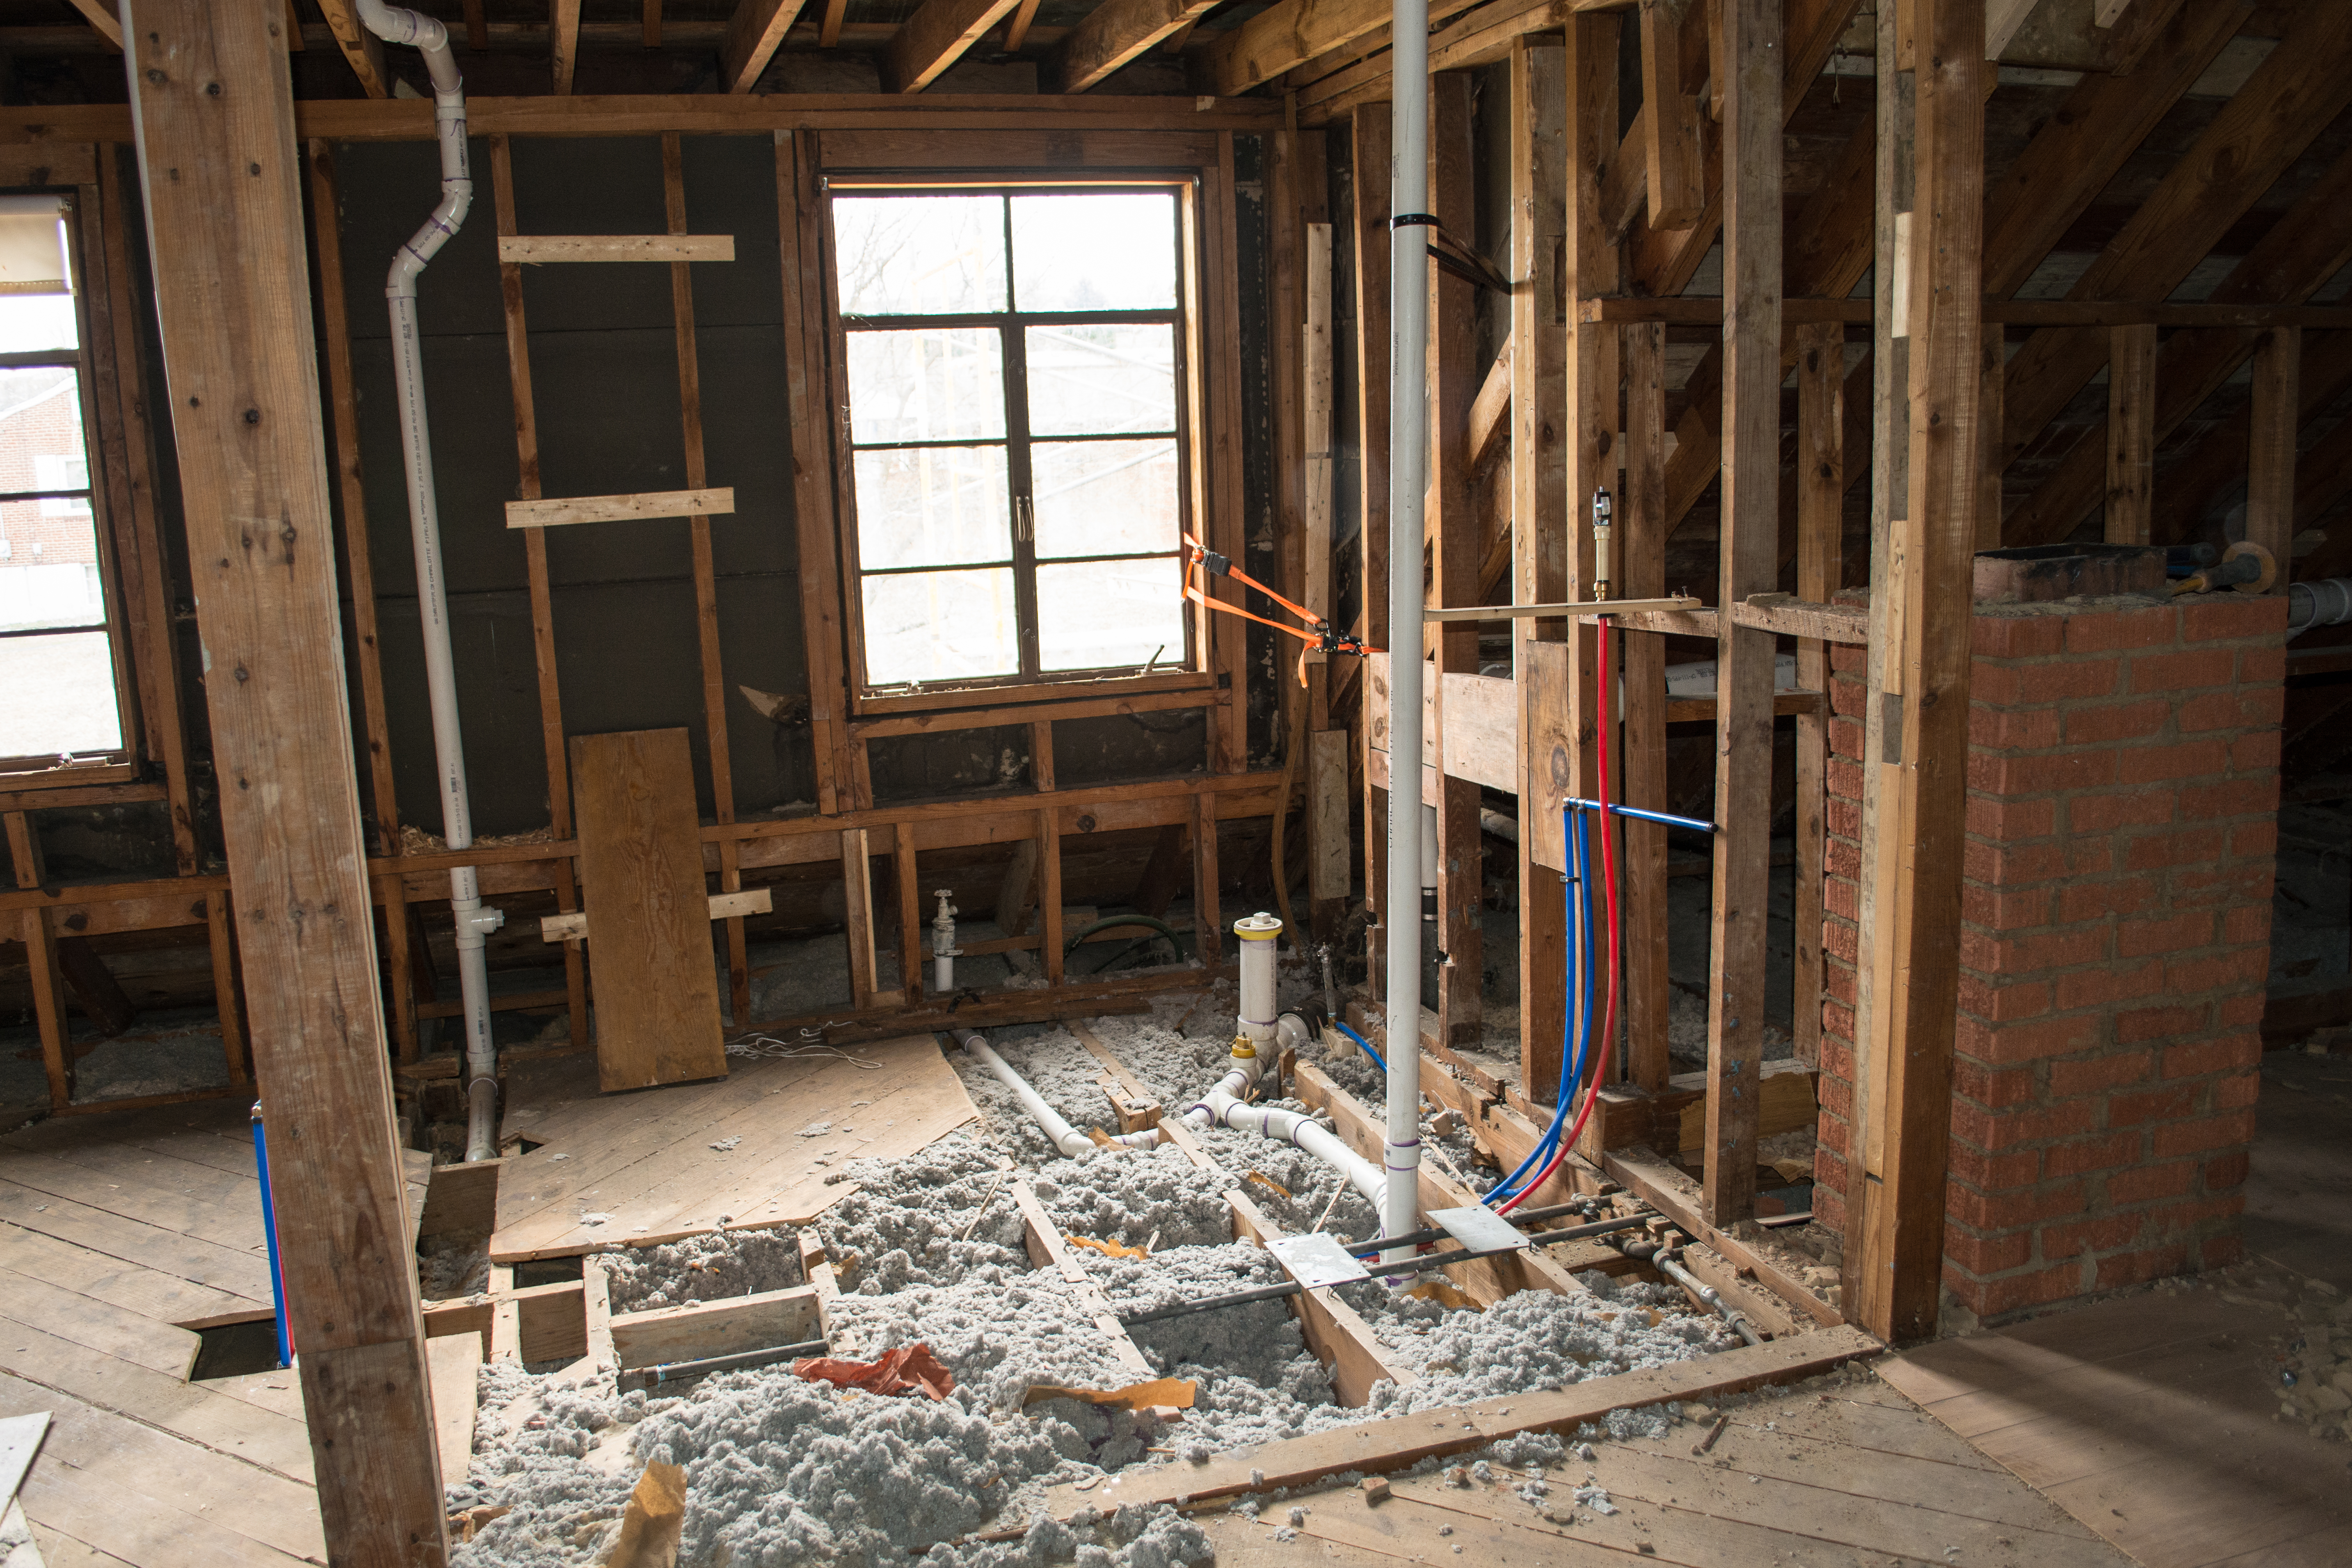